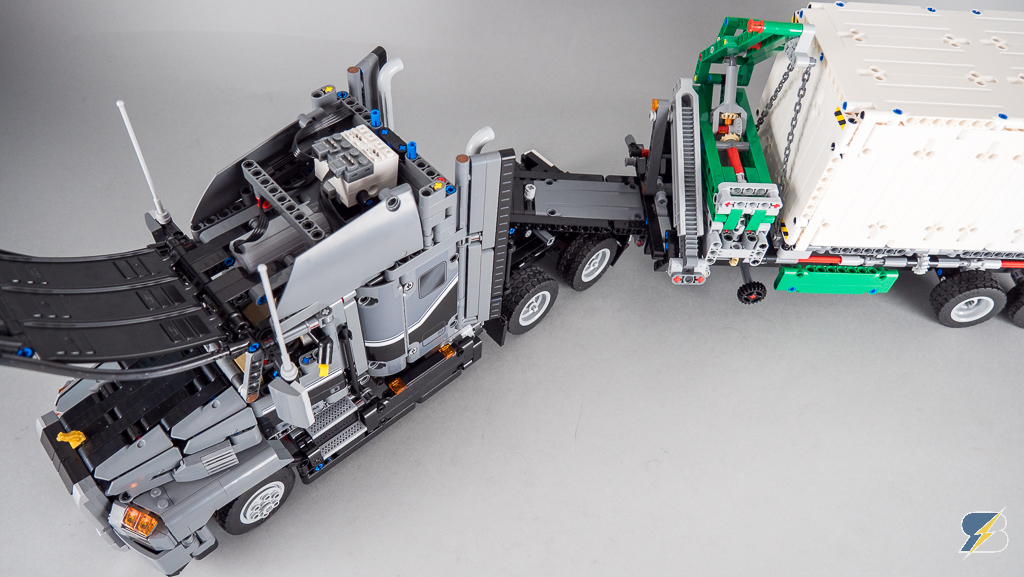
I made my first quick proof of concept rc mod of the Lego Technic 42078 Mack Anthem truck to see which motors fit and how in the chassis using some spare parts I had. I did not plan to release any instructions or images about it as it was just a test and I will do a proper RC mod sometimes in the future.
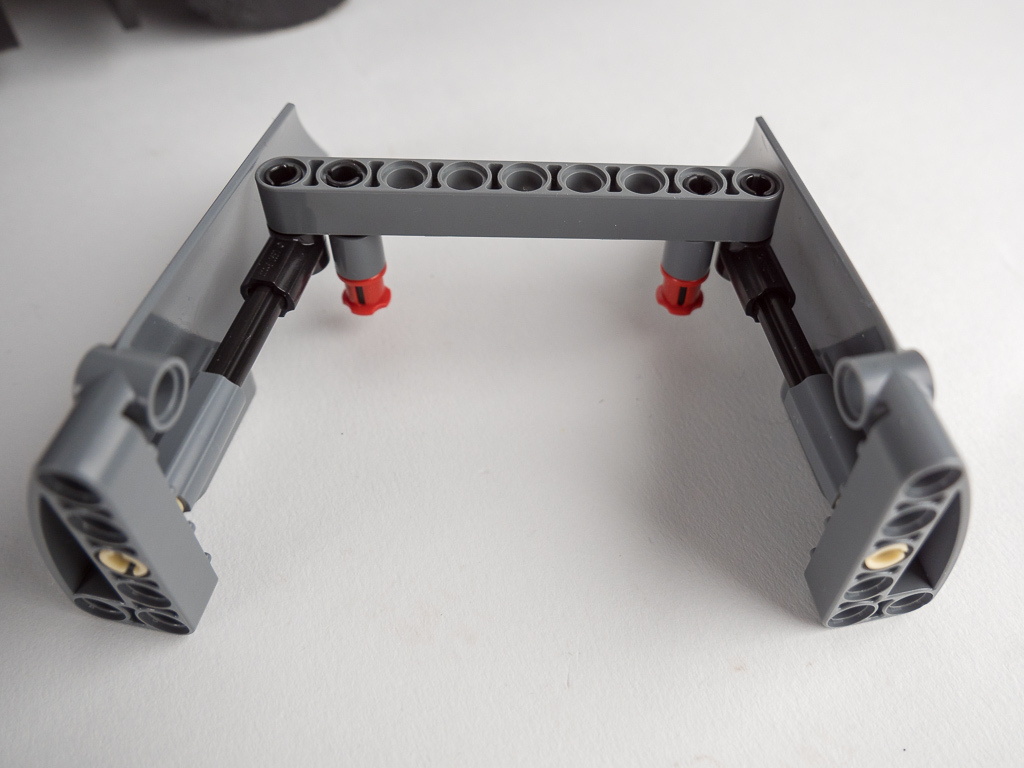
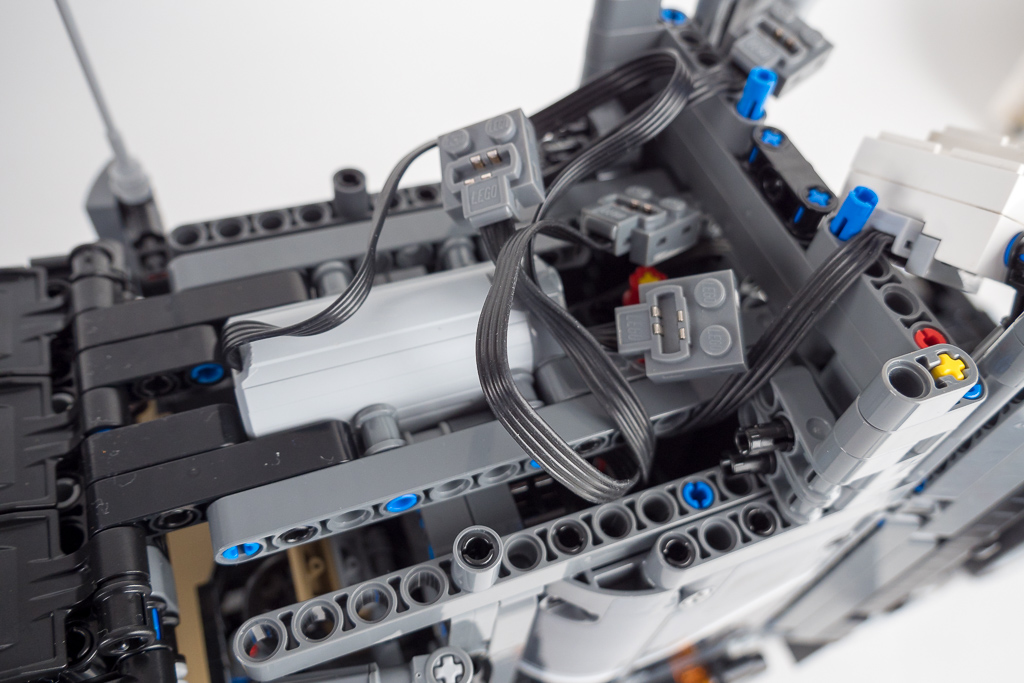
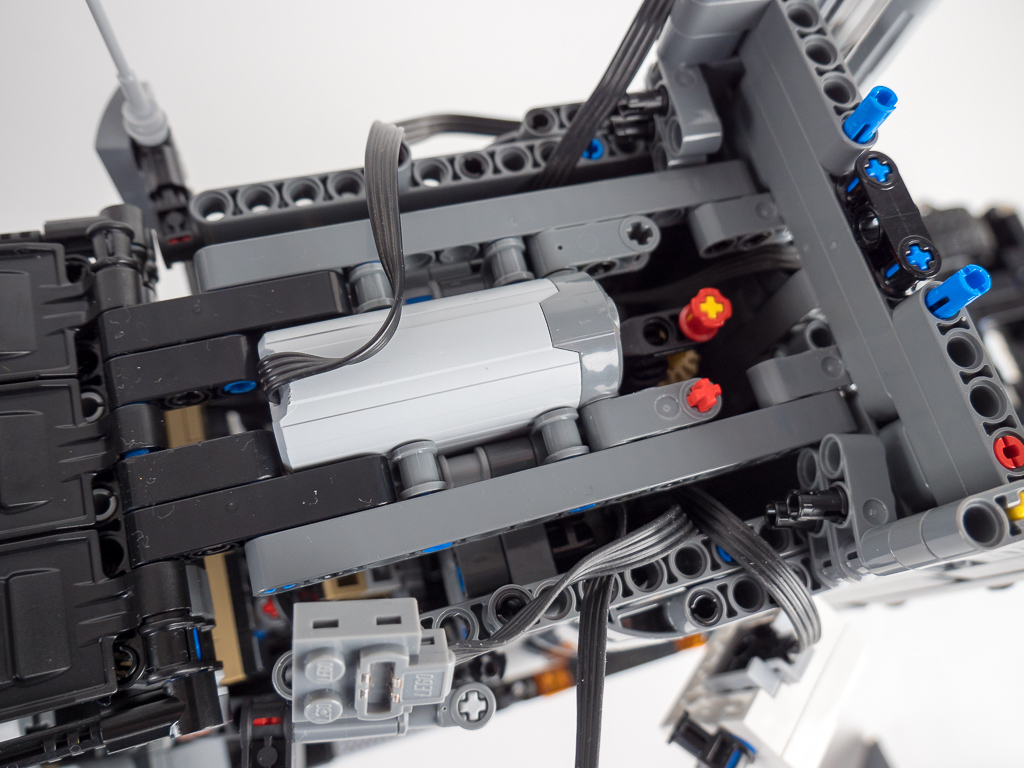
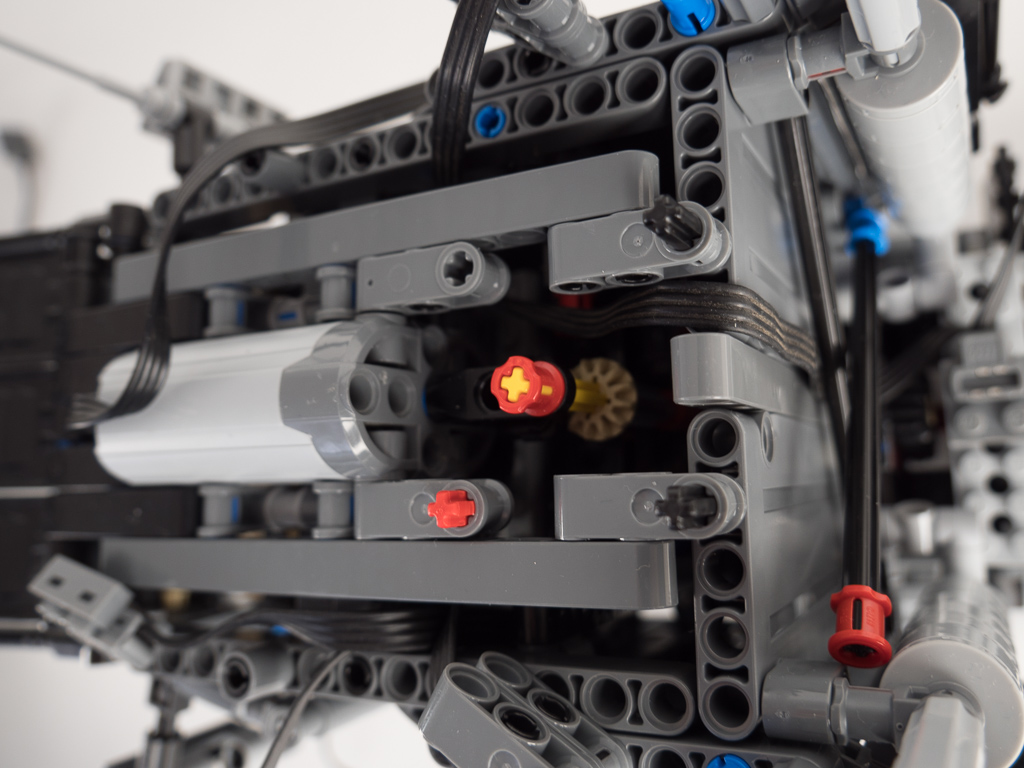
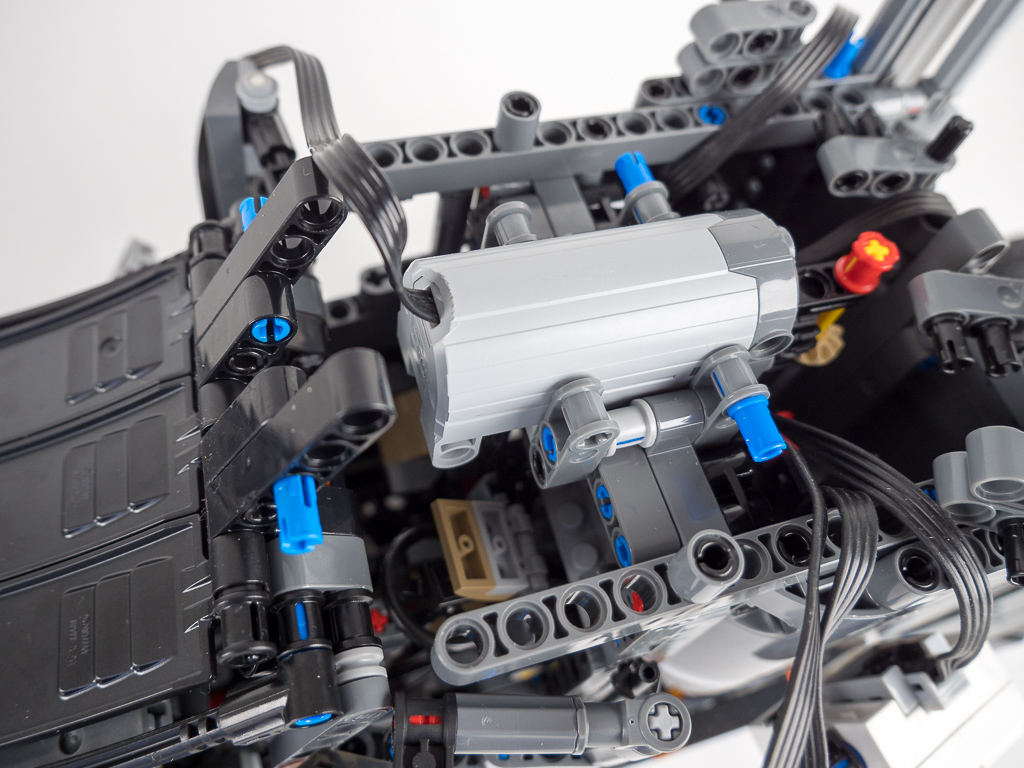
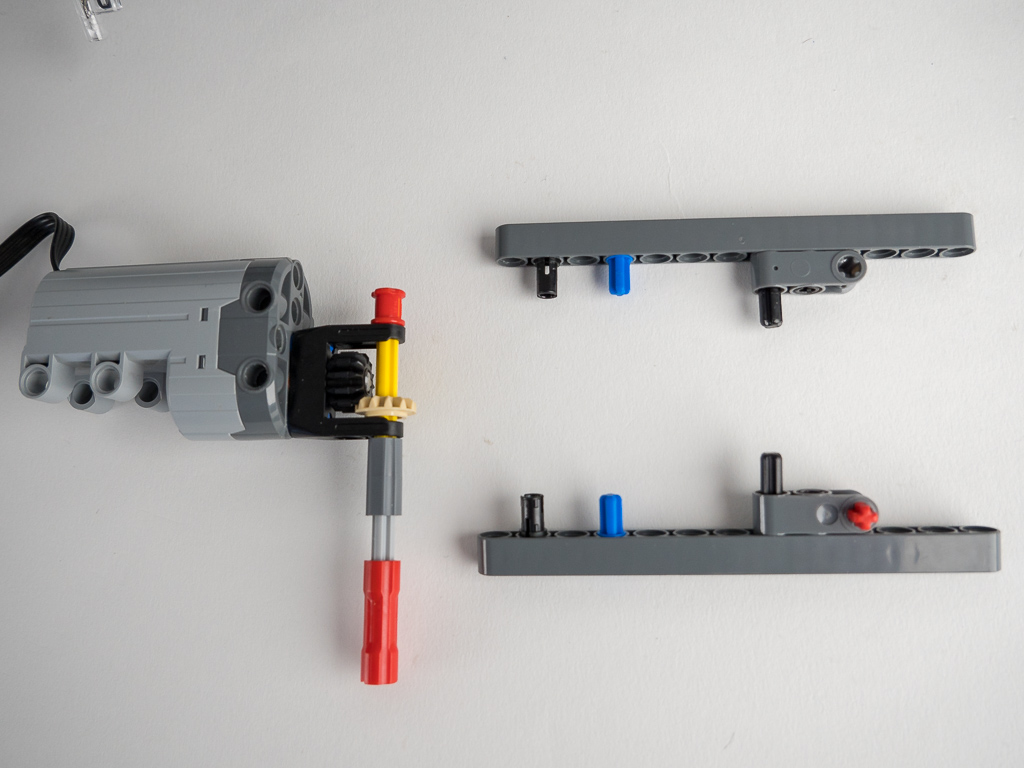
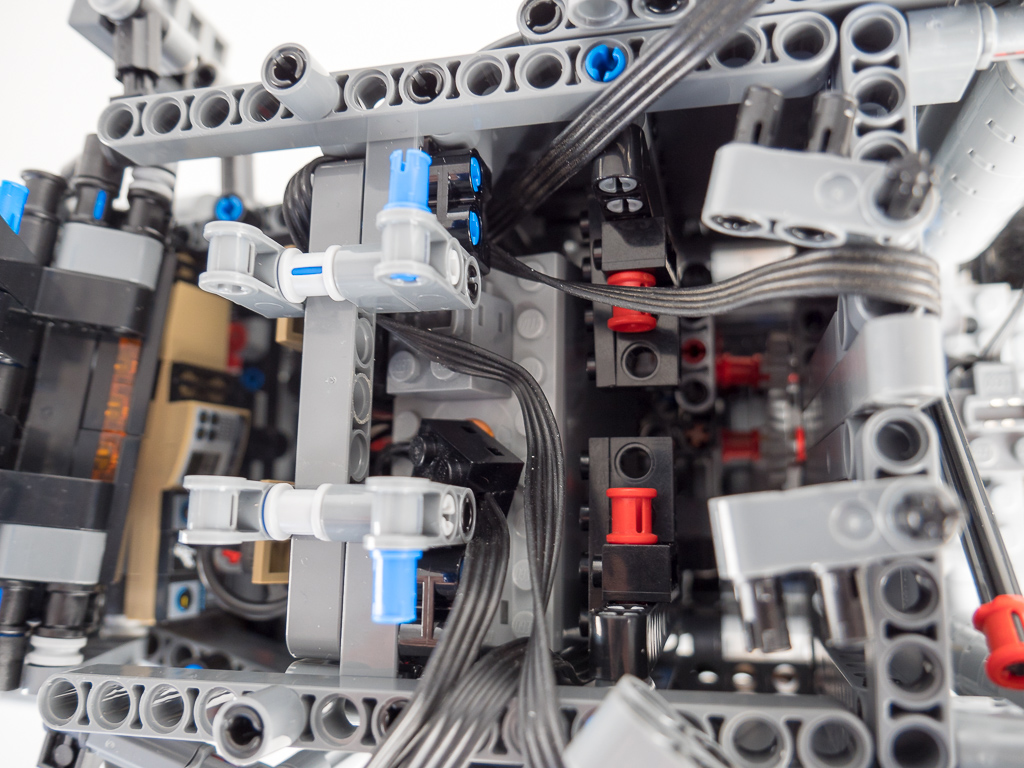
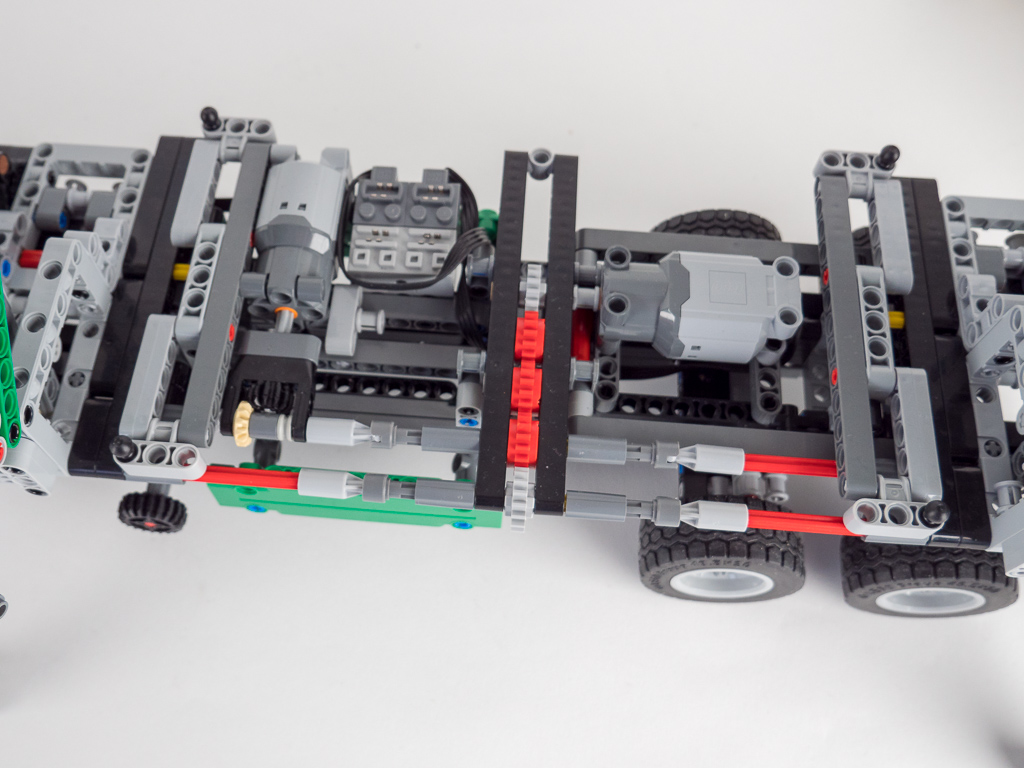
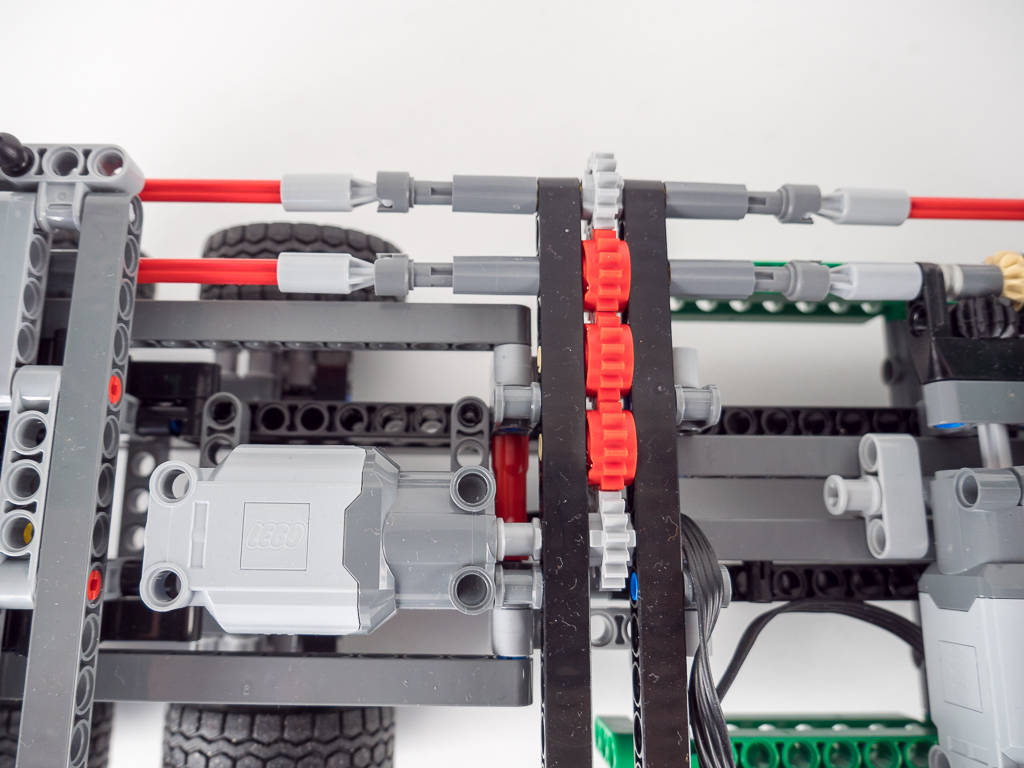
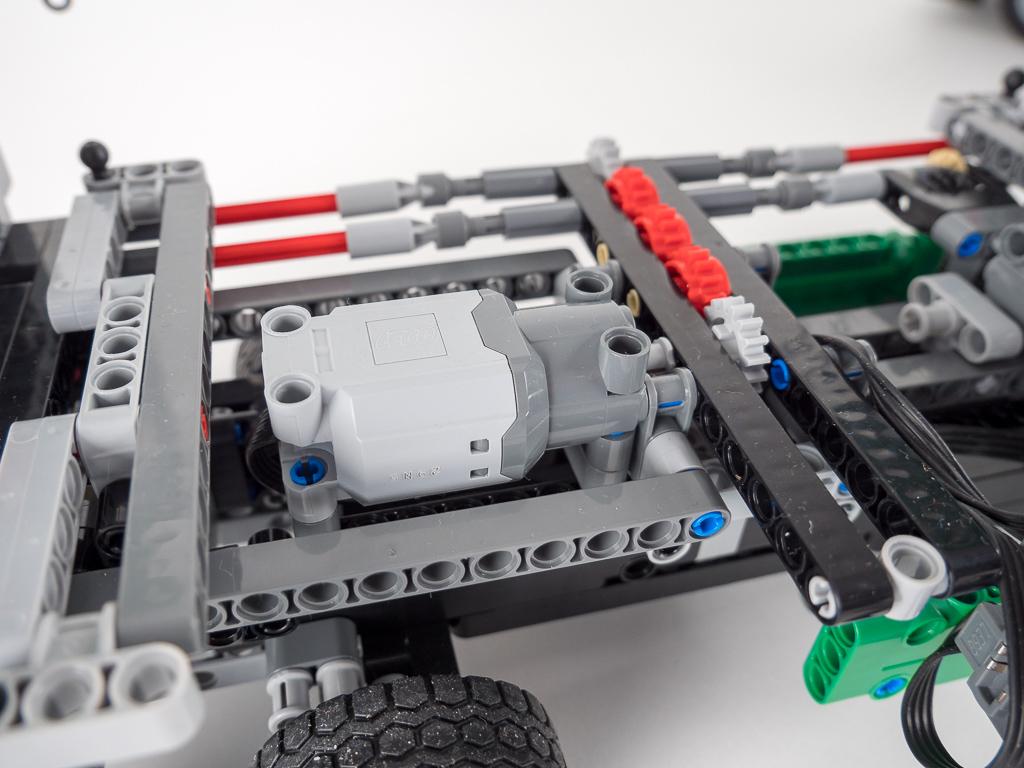
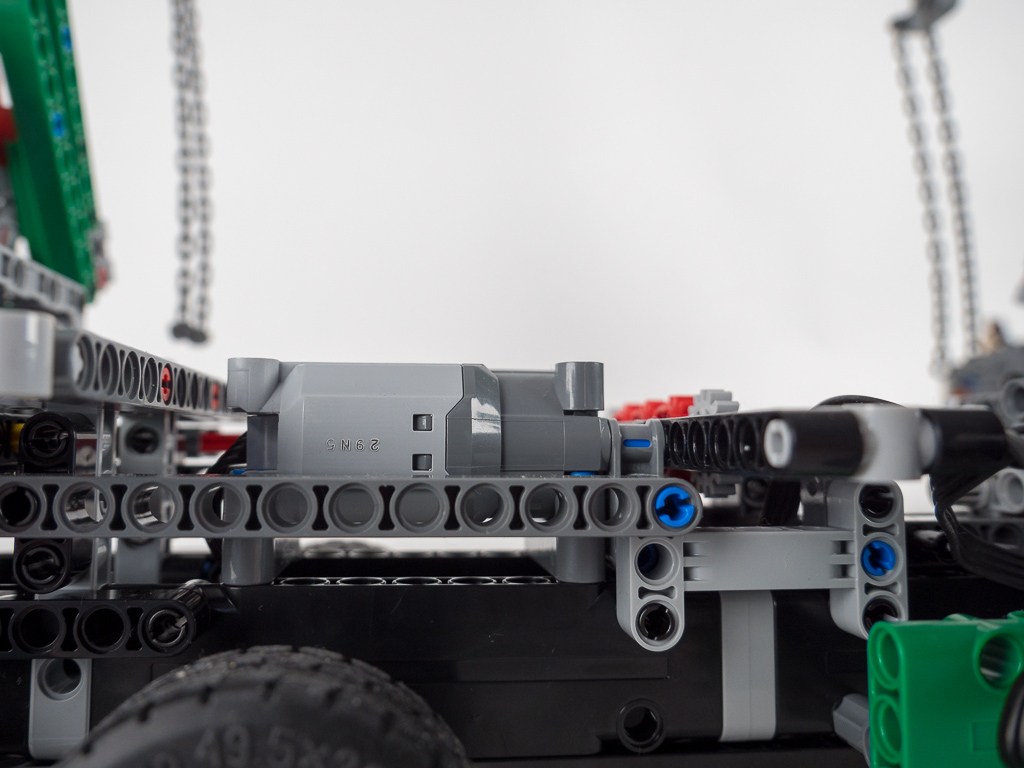
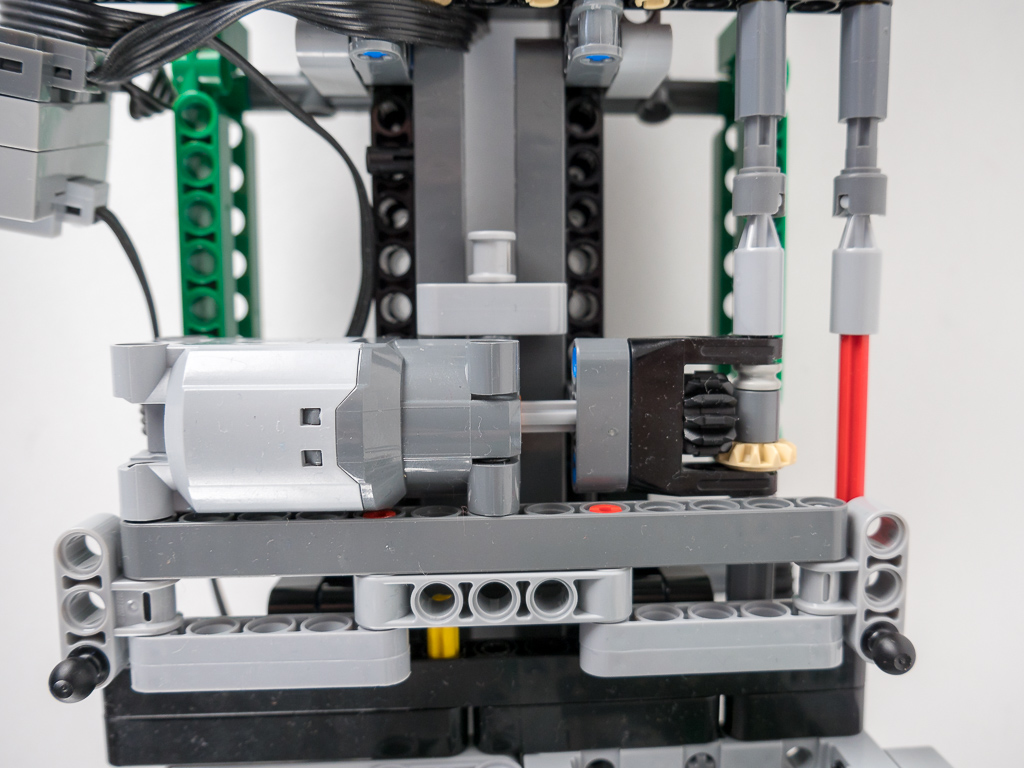
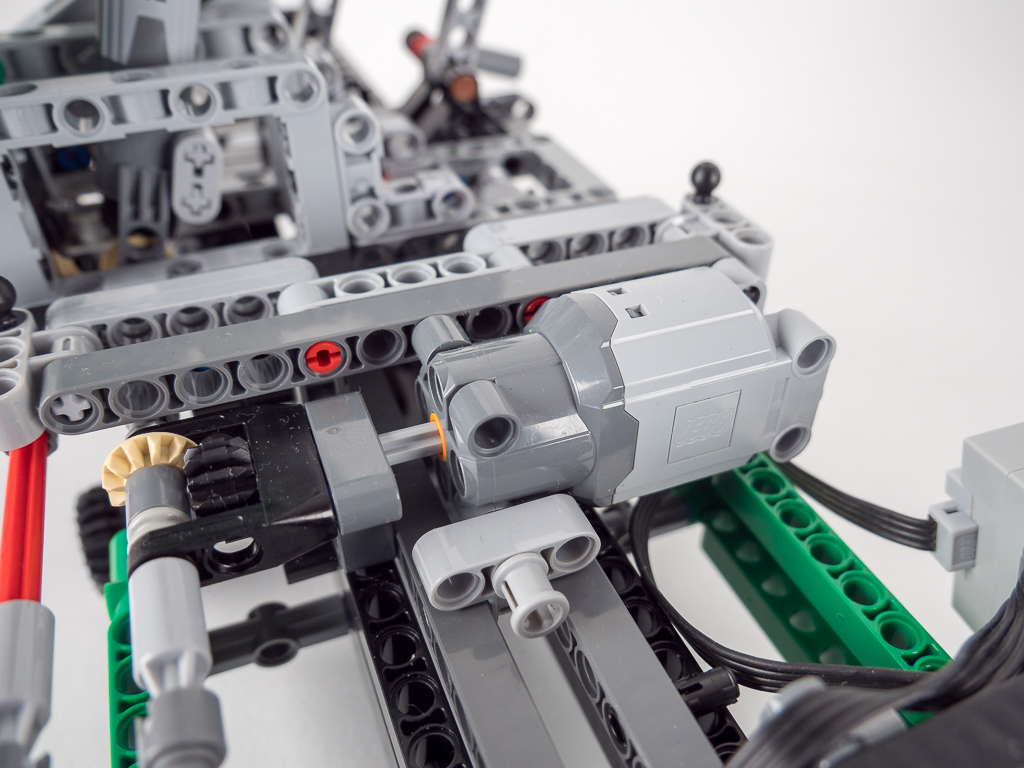
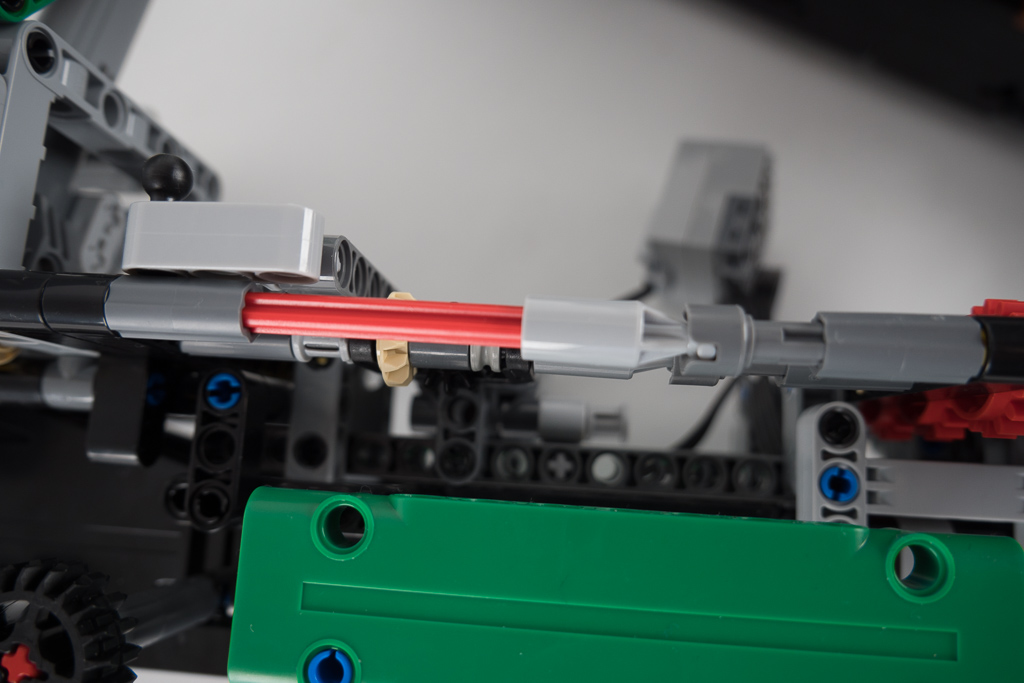
Since I received tons of requests to provide information about that mod despite its rudimentary approach, I decided to share the images here what I took during the disassembly. Please note these are not instructions, I only have these images as the model is rebuilt into the Garbage Truck now. Please don’t ask for more information or further instructions, this is just a little help for you to see how I did it and it can be used as a help or starting point for your own RC mod.
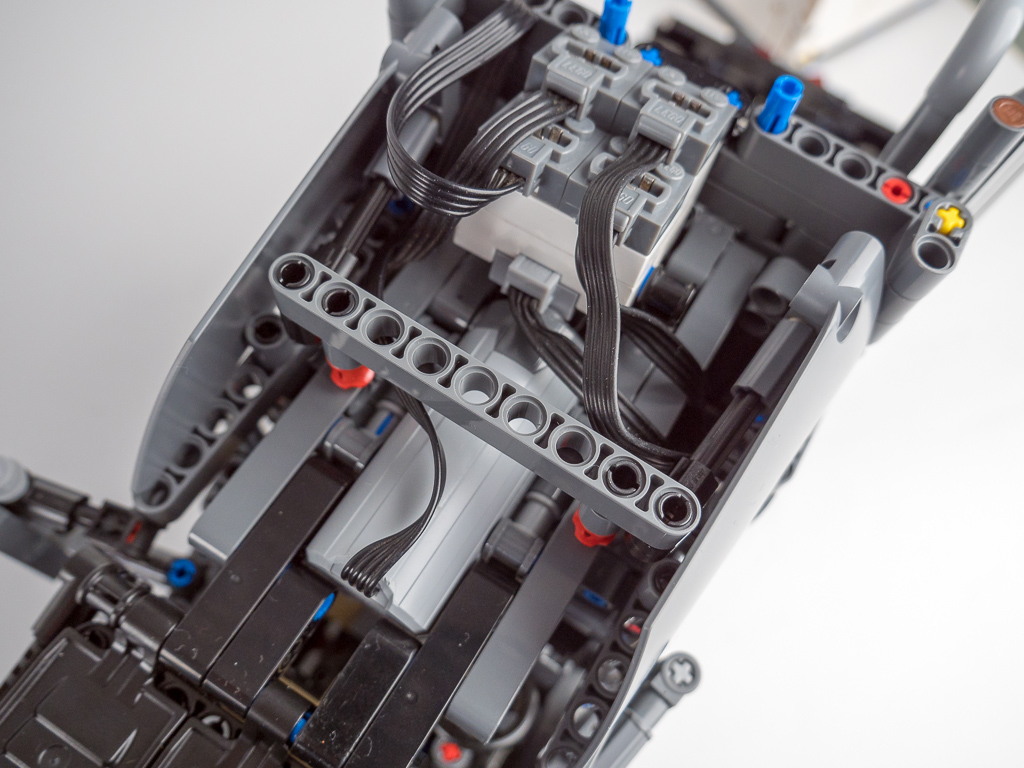
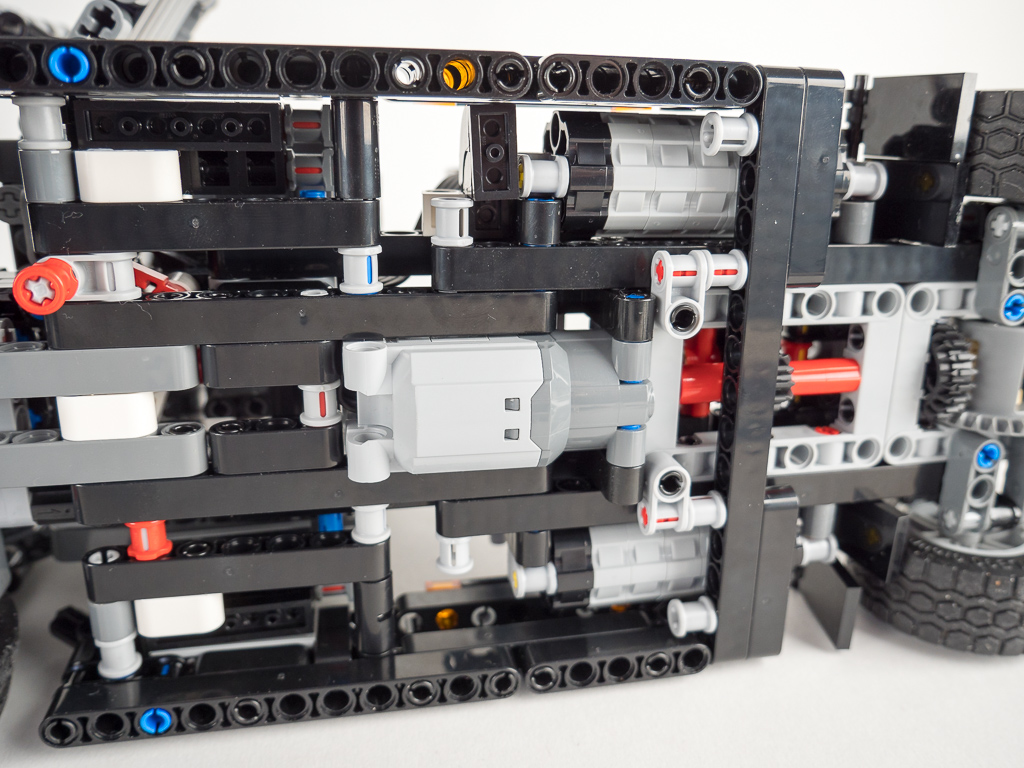
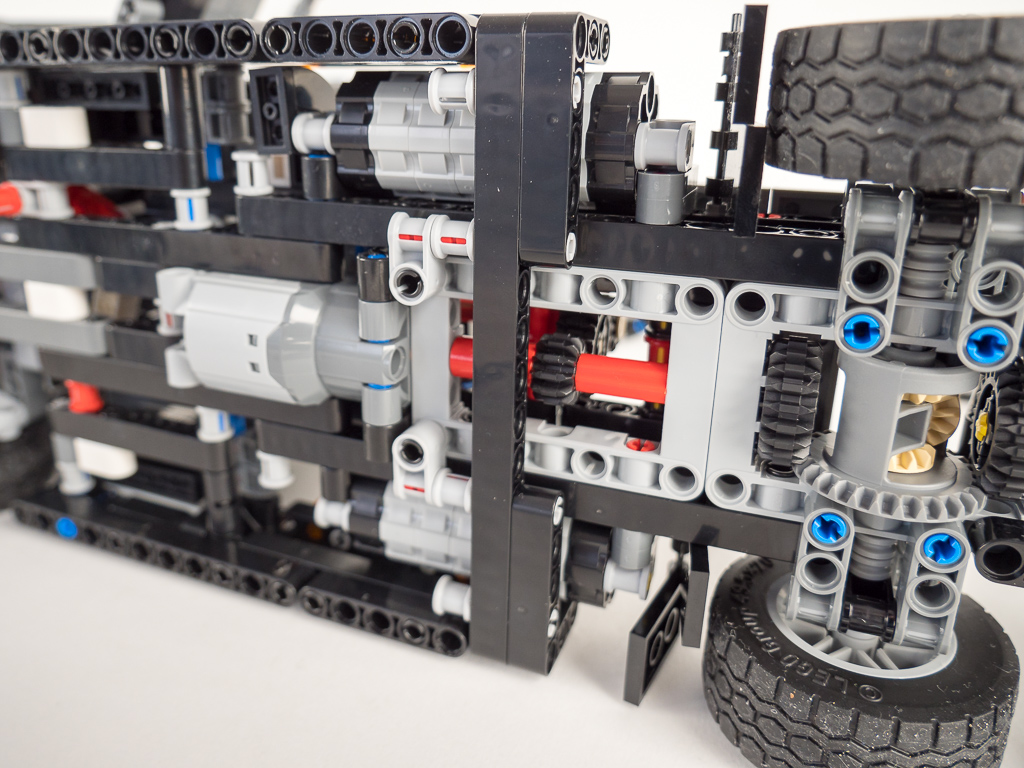
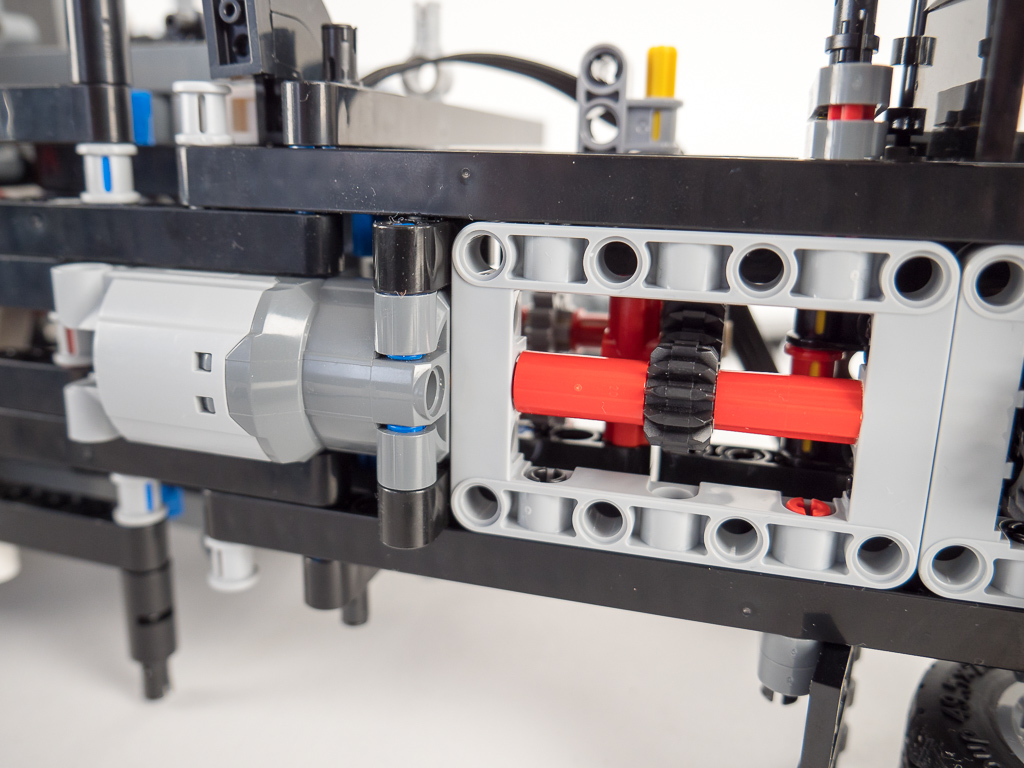
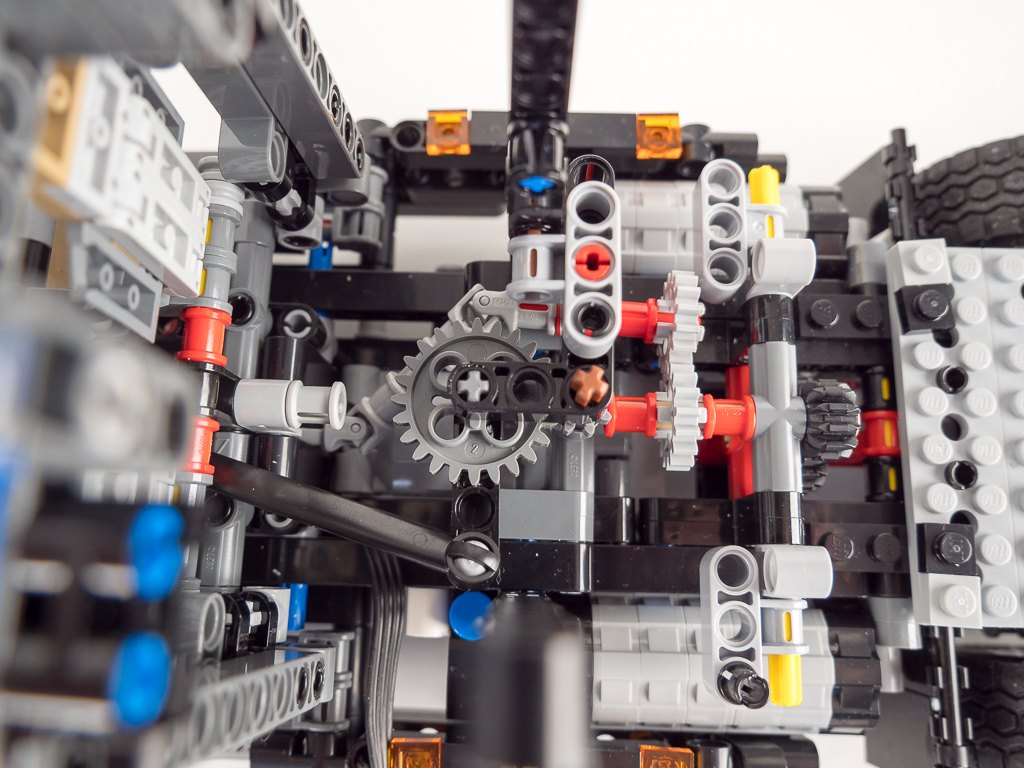
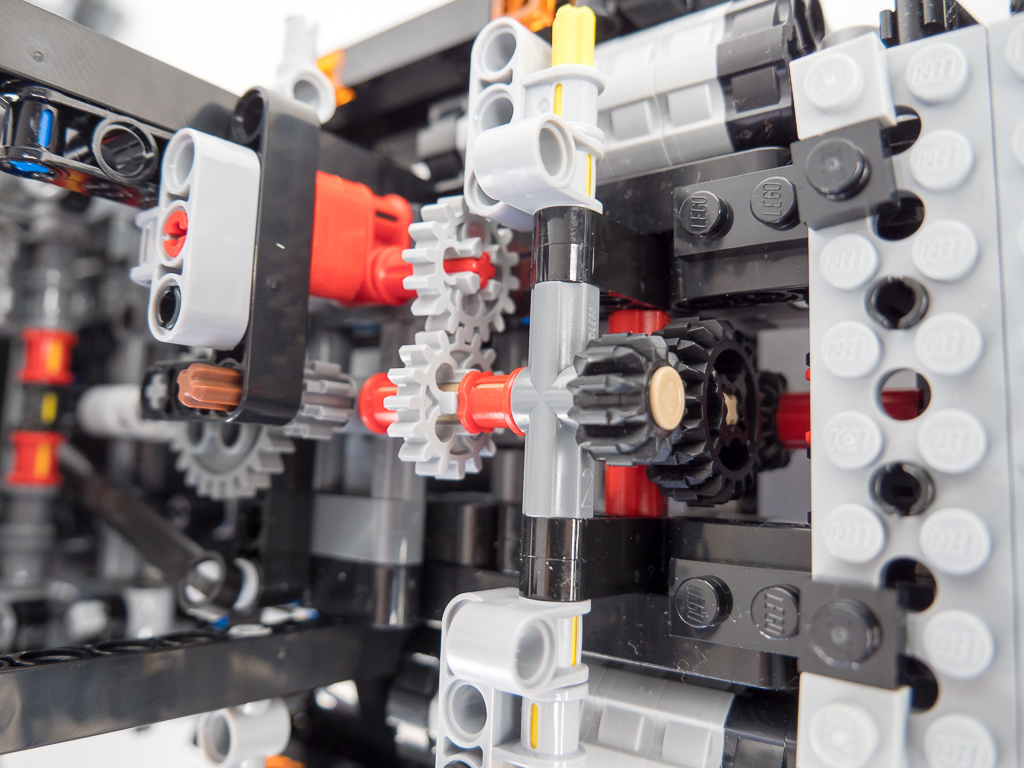
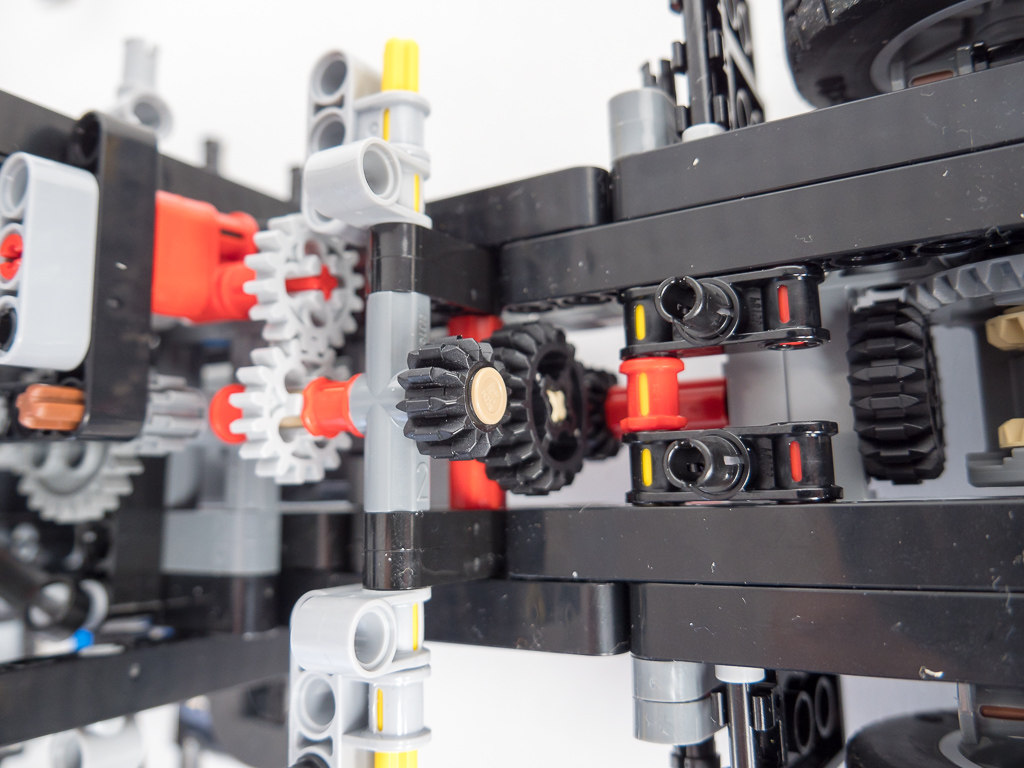
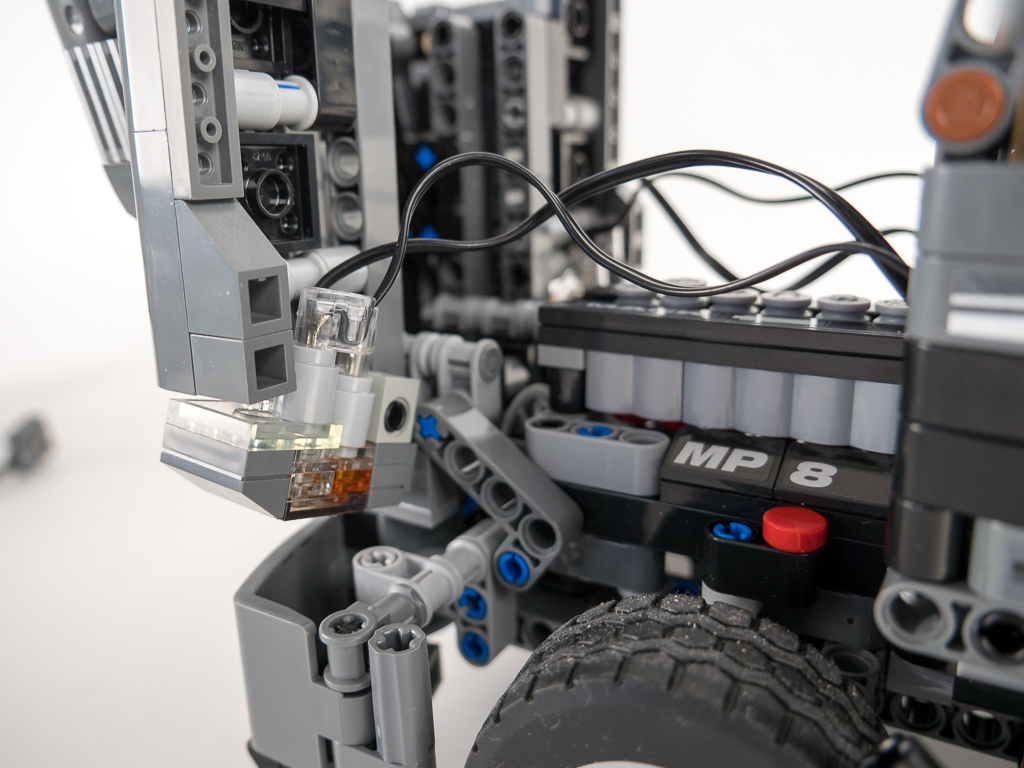
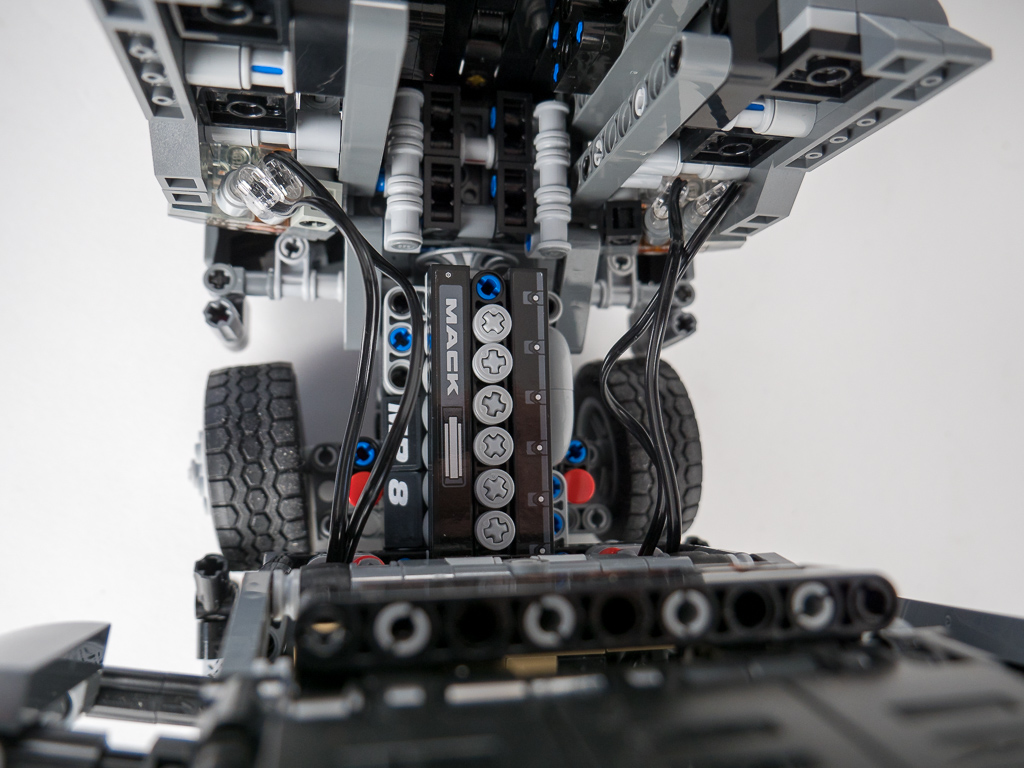
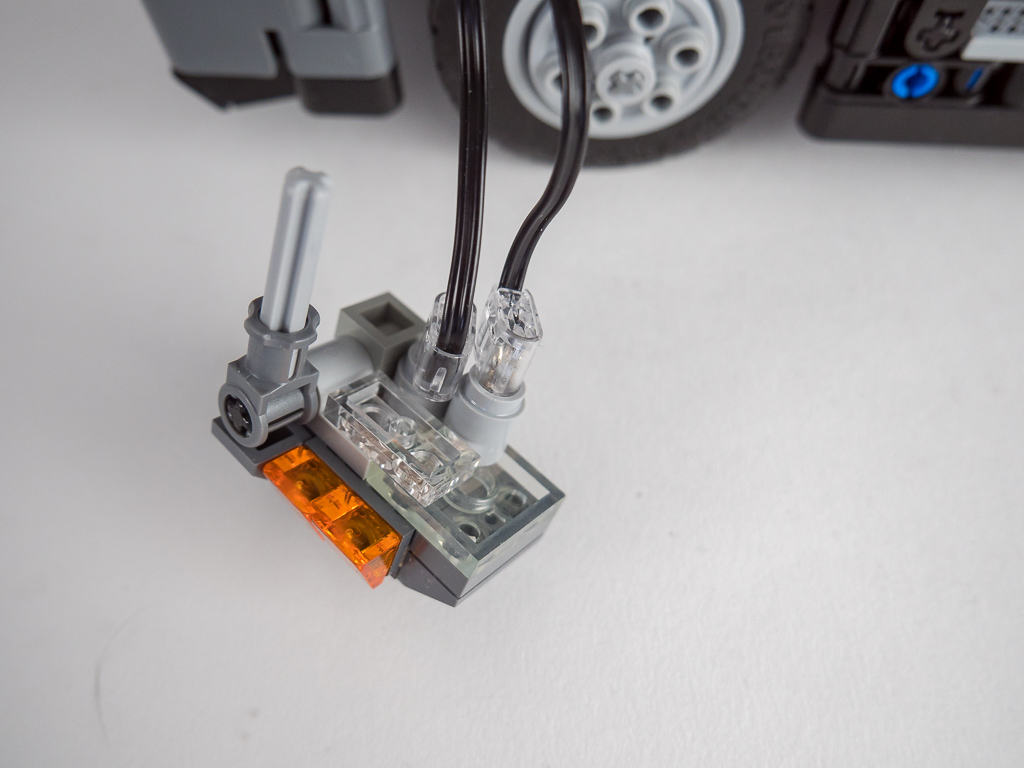
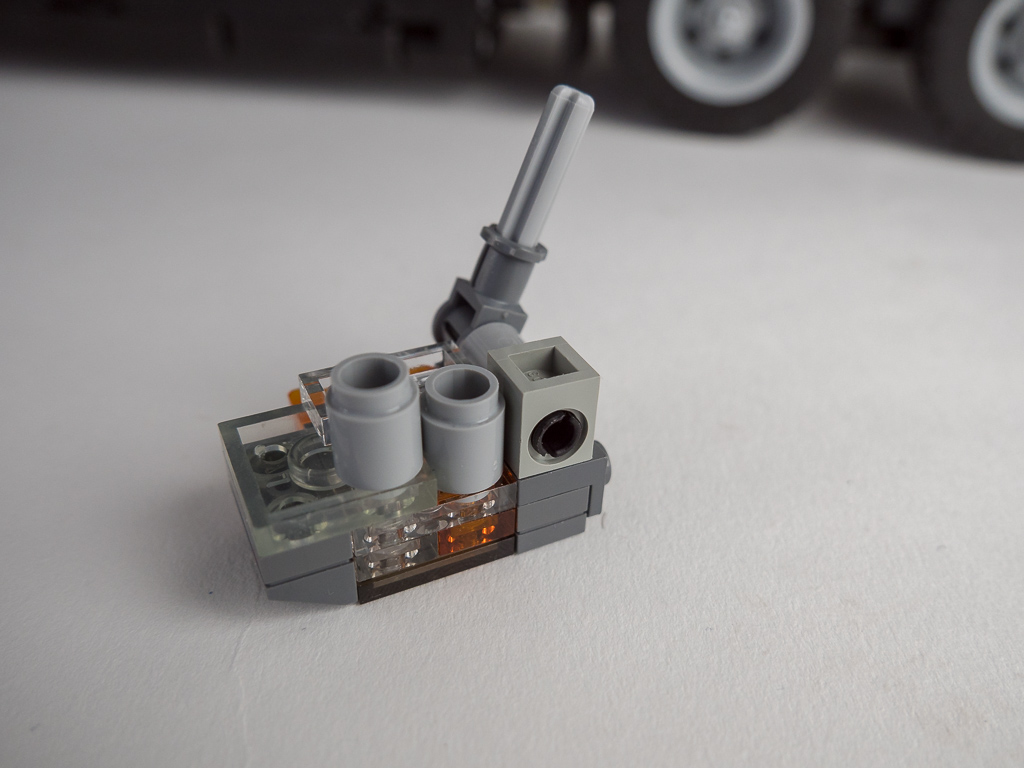
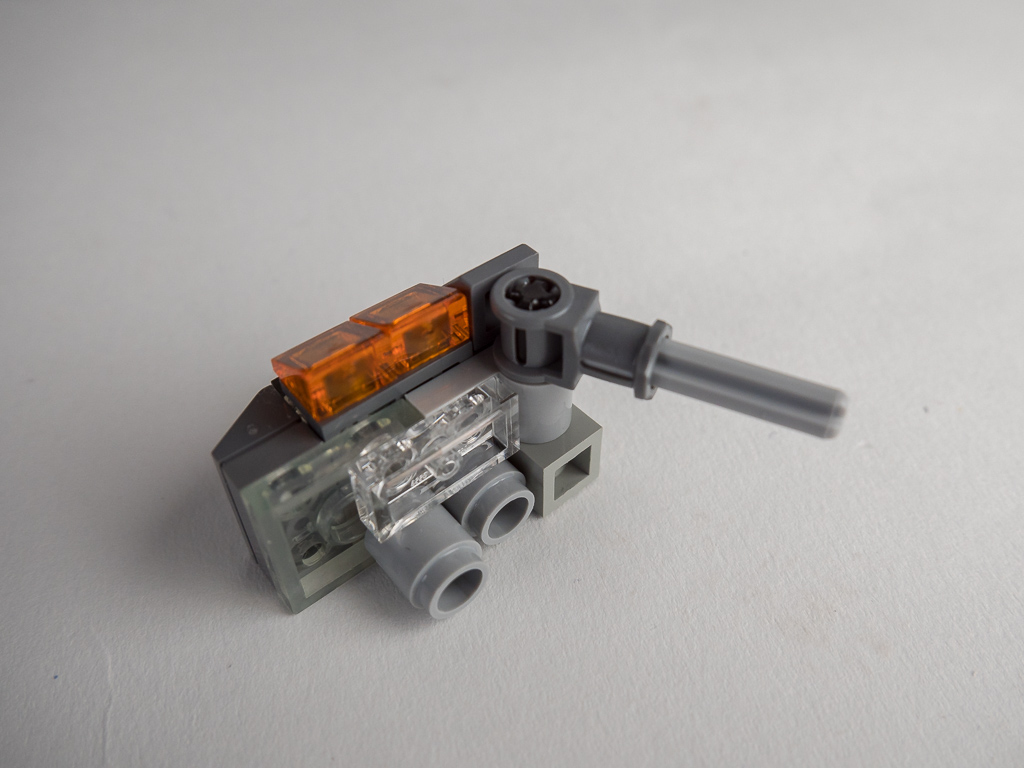
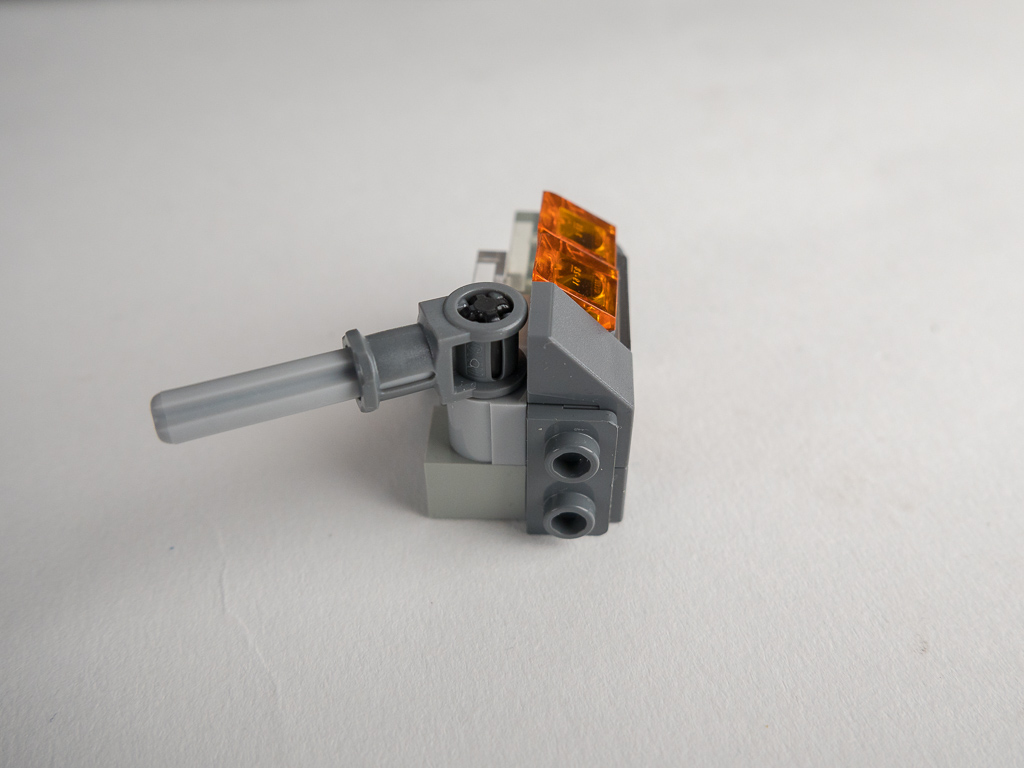
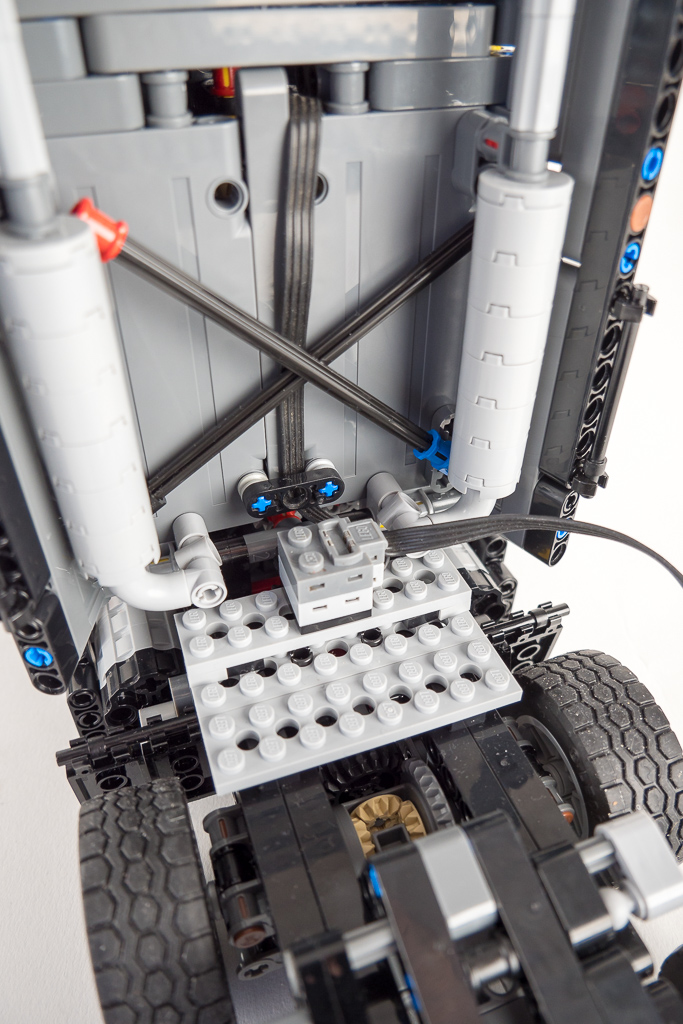
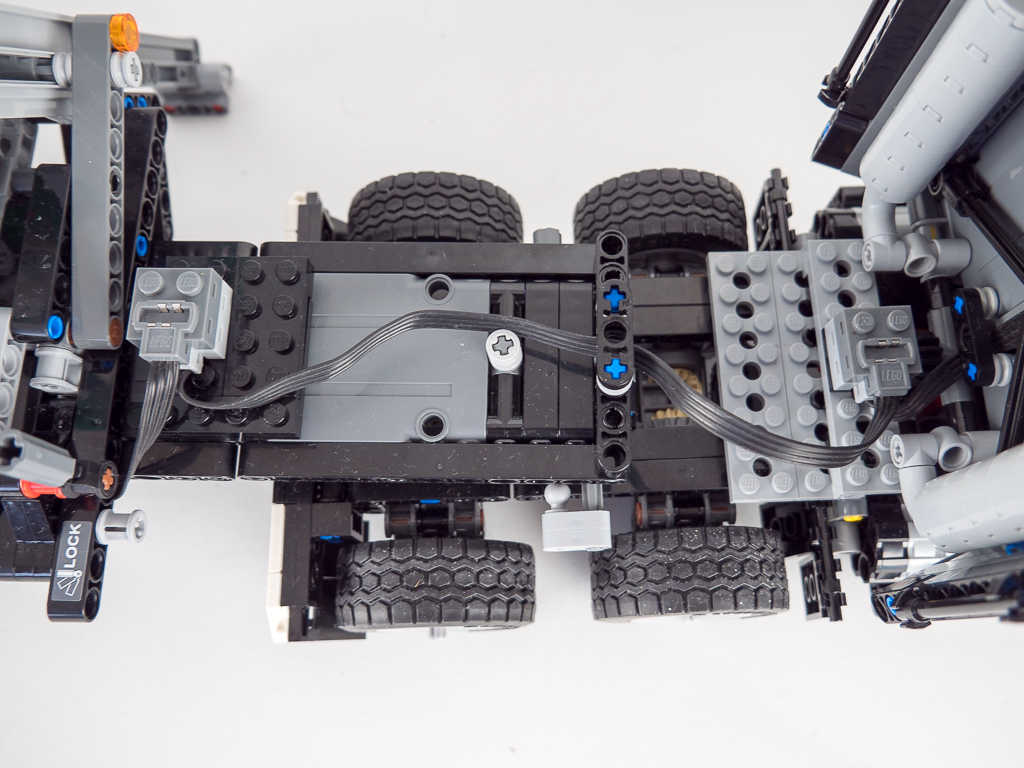
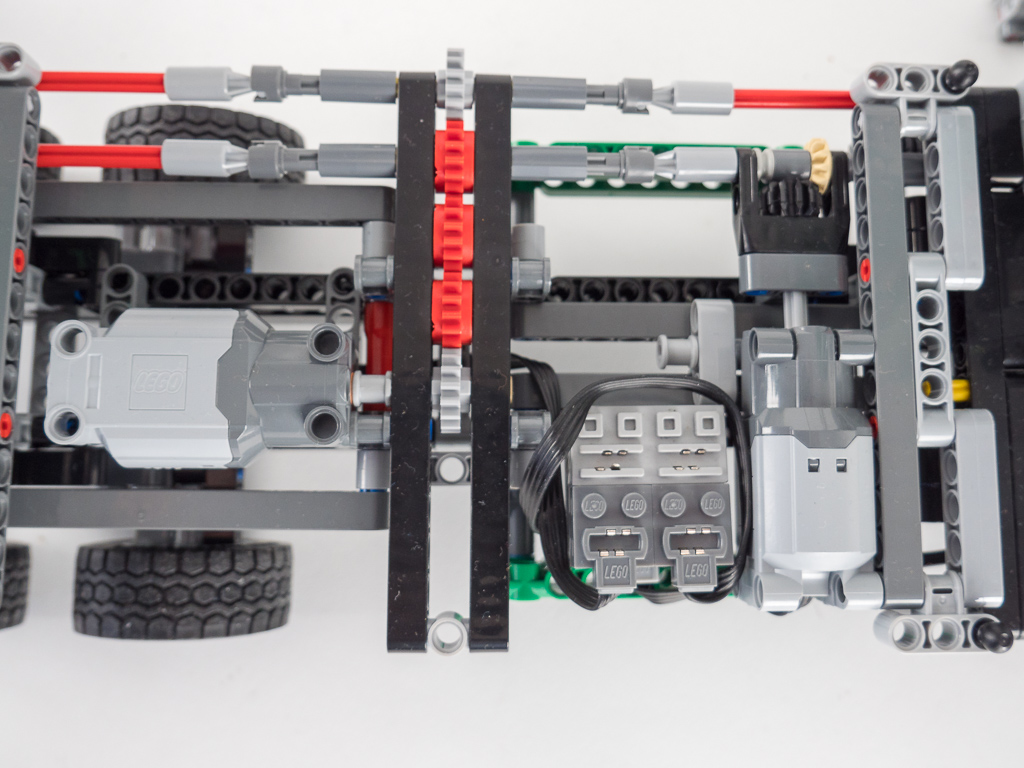
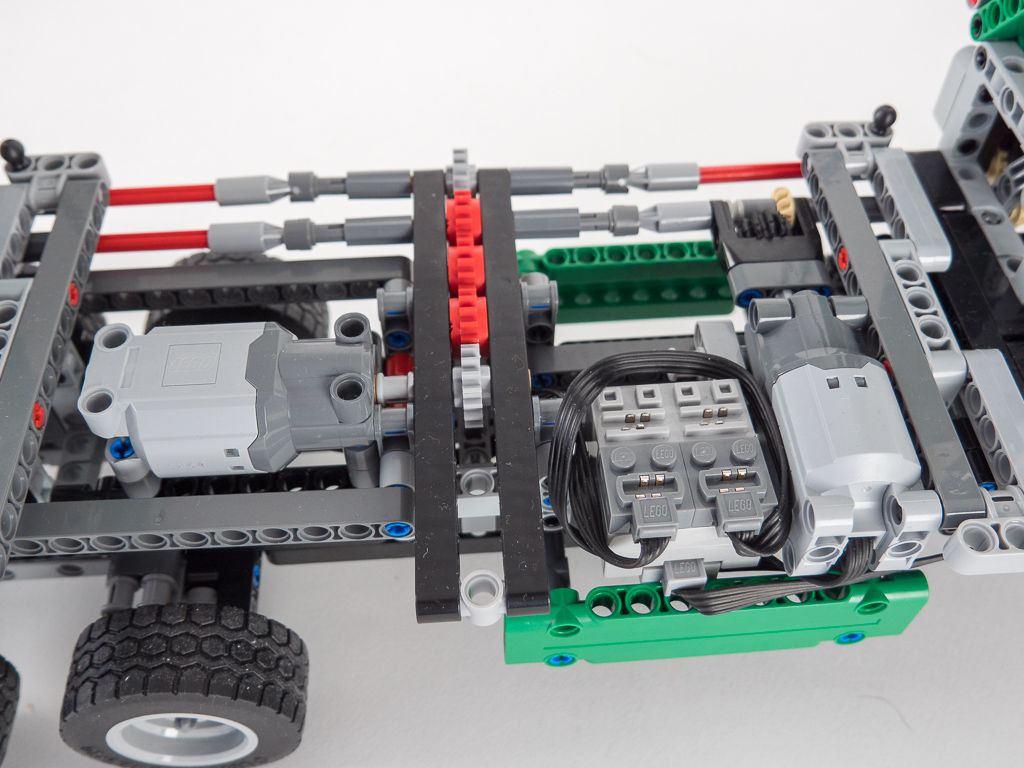




Hi, I really like your RC Update for the MACK Anthem an I would like to upgrade my one. Is it possible to get a List of required parts for this upgrade. I haven’t found a link to a website where to buy your changing and part list. I am looking forward to your response. Thanks for sharing your expertise. Best regards Heiko
Hi! I’m not sure if your read what I wrote in this post? I understand what you are looking for but I don’t have it unfortunately. Maybe in the future if I’ll have time I’ll do a proper RC mod with instructions but that’s a huge effort and takes a lot of time.
I was looking at your pics of where and how you did the motors. But I didn’t see where you put the battery pack at. Can you tell me where the battery pack is located at?
Thanks
The battery is behind the seats – you can see it on this image: http://racingbrick.com/wp-content/uploads/2018/01/PANA0374_blog_ret.jpg
If I’m seeing this correctly. You used the square battery pack which holds 6 – AAA batteries correct?
Hi Racingbrick
Hope you well,
Your MOD is exceptionally good and well thought of, i have this set myself and i myself would love to know what is required to achieve this, however, I do not understand why you are so rude and reluctant with regards to sharing the requirements\parts list required to accomplish this MOD
Yes i do understand it is time consuming and a lot of effort, but in the same breath why post or share this MOD without being receiving to questions from your fans\followers on how to go about achieving this MOD
Hi Kreshen,
Thank you for your kind words, let me try to explain why I am “so rude and reluctant”. Modding this set took me around 2 days altogether. The single purpose of this mod was to see what motors can drive the truck and the trailer and whether these motors fit in place. This is not a well designed nor well prepared mod, just a test for fun. Please allow me the freedom to decide whether I’d like to share images or videos about any of my creations regardless the fact that I’m planning to share instructions for it or not.
A lot of people who create Lego mods/mocs do not share instructions at all, simply because they would like to spend their precious time with the creation/building part. I’m not sure if you ever tried it, but believe me it takes much-much more time to create proper building instructions than to do the mod/moc itself, even for smaller builds. This set has more than 400 pages of instructions originally, can you imagine the effort needed to properly update all of it and include the steps for such mod? I’m doing the motorization in a freestyle way, simply partially disassembling the vehicle and testing what/where/how fits by adding and replacing parts. To create any kind of instructions I’d need to separate the original pieces from the ones I’ve added (we’re talking about 2500+ pieces don’t forget), taking pictures of every single step of the disassembly or comparing those to the original building instructions and highlighting all differences/replacements.
Hopefully now you understand that creating a mod and providing instructions for it is nowhere near “doing it the same breath”. I think I was kind enough to document the disassembly process with the images you see above to give some hints to anyone trying to achieve a similar mod. I did create instructions for some of my previous creations and I’m also planning to do in the future, but I’m expecting you to understand the effort needed for the things you’re asking for and to observe it rationally.
Racingbrick,
well said,
part of the fun is, figuring it out.
your pics will help a lot.
If only for the fact, it can be done, in the first place.
and you are not rude, only perfectly clear.
Mark
Bravo Racingbrick how rude of Kreshen. Your vidiis and advice, which you give freely, is apprecaited.
How rude of Kreshen. What a cheek when you give your advice freely to all.
We all very much appreciate your the help you give us. Many thanks, Racingbrick.
Thanks for the details pictures of how you made the proof of concept. Still learning a lot working with technic and MOC. Your kind pictures to help us is greatly appreciated. Love all your builds and video’s and I know how much work that is, so thank you.
Many thanks Michael for the kind words!
Really appreciate the amazing mod RC of 42078, I understand it is time consuming and a hard job for creating instruction. No hurry, just do what you want, I will wait you patiently for the instruction
Hi Jason! Thanks for the kind words. I’m not sure if/when I will have time for the Mack Anthem RC mod. I suggest to have a look at the following topic on Eurobricks, there are Lego Digital Designer files shared for multiple RC mods, they should help you to motorize the set:
https://www.eurobricks.com/forum/index.php?/forums/topic/157208-42078-mack-anthem-mods-and-improvements/
Your a genius In this and the picture helped a lot. I myself is try to figure out on how to do it. I’m really looking forward for a video on it soon because this is the best LEGO set I’ve worked on.
Just wanted to thank and compliment you. I’m a powertrain installation design engineer at the corporate headquarters of a certain North American class-8 truck manufacturer (which must remain unnamed due to corporate social media policy), and was the first person to have this Lego set in the US–shipped directly from Bethlehem PA. Full retail price, of course. I was showing your video at the office before my set even arrived. I’ve been building it slowly at the office, but a few others bought one, sometimes two kits (for both models, obviously) and already have their completed work proudly on display. So now I MUST use your approach to RC mine. The very honor of engineering depends on it. This is the only Technics set I own, so hopefully I won’t need additional parts. But if I do, I’ll either have to beg/borrow from someone (with kids), or model in CAD/scan and 3D print. Be assured that if I’m successful, your work will get some significant visibility soon. Maybe I’ll even put it in the dyno. Or the wind tunnel. Oh, that would be fun. Possibly a video of it driving onto display ped in front of the building? Or maybe I’ll just cruise it around the office and harass people. If only it had a horn…
First of all thank you for the kind words. As an engineer you may recognize that my version is not that sophisticated and the motorization can be done in a better and more efficient way. I suggest you to have a look at the Eurobricks forum topic I mentioned in my previous comment. There are LDD files to download for better mods, Efferman’s design uses an XL motor with better placement and as I see you’ll need less extra parts. But you’ll need extras for sure, so if you figure out using the 3d model what’s missing I suggest to use bricklink.com to get the extra parts. 3D printing for Lego might be too expensive and the precision of the pieces versus the original molded ones would not be satisfactory, especially with the extra gears you’ll need.
Can’t seem to figure out the steering problem I’m having or some of the infrastructure with the motors in and on the bottom of the cab.
I suggest to check my previous comments and have a look at the 3d files on Eurobricks for a detailed mod.
Hi mate,I think your well in your right to keep your plans to your self,Lego is for learning,so people should just get on with it,and maybe someone else may post one,keep it up,!!!
Thanks! It’s really not about keeping the instructions to myself or sharing them, if they do not exist then I cannot share anything 🙂 I always try to make some photos to provide some guidelines, but as I said earlier creating a full instruction set can take weeks or more..
Hey racingbrick
I just got this truck today for the holidays But I want to moterize it.
Is there the slight chance that you can remind what you used cuz Im going on vacation and I want to moterize it there.
So is it possible that you have a Parts list for the mod?
It would’nt matter if Its only the parts and Not how many, just so I can get all the stuff.
-Sjoerd krempel
Sorry but I don’t have the part list for this RC mod and as I mentioned previously it was not a properly tested one. If you’re looking for an RC mod with part list and everything I suggest to have a look at this one – https://rebrickable.com/mocs/MOC-12660/CustomBricks.de/custom-mack-rc-modification/#comments
Hi. How many motors you used and with one? large, medium or xl?
As you can see on the photos it was one Servo and one L motor
I see one servo and 3 motors
Hi, I was just wondering if it is possible to buy a kit or list of required parts as I would like to motorise mine at home.Thank you.
I don’t have one for this model, sorry
Hi there. Is Anybody tried to upgrade truck with “lego technic control plus”?
Hi can you tell me how you attached the battery behind the seats please
Thanks
The build was disassembled a long time ago, I only have these pictures about it sorry