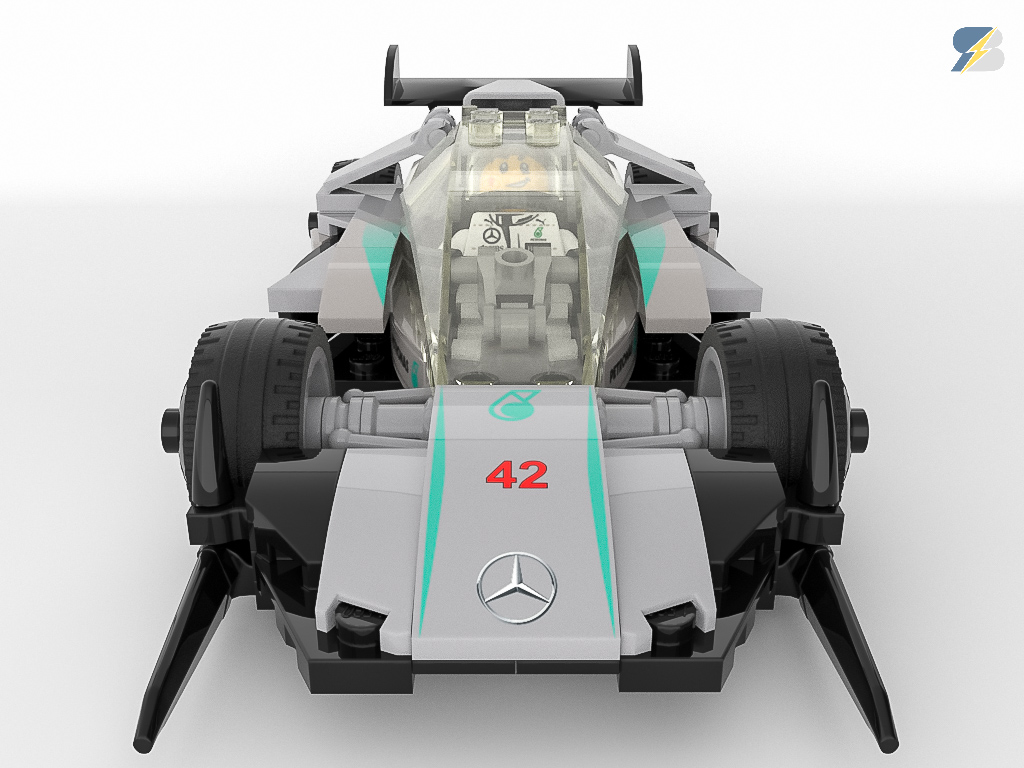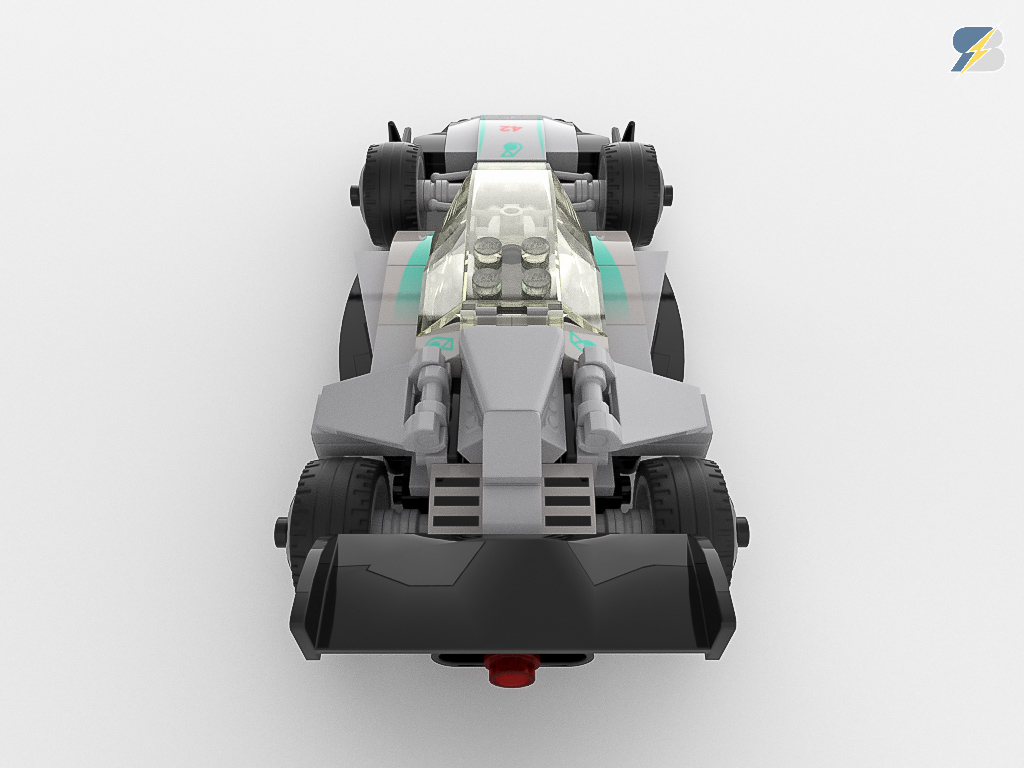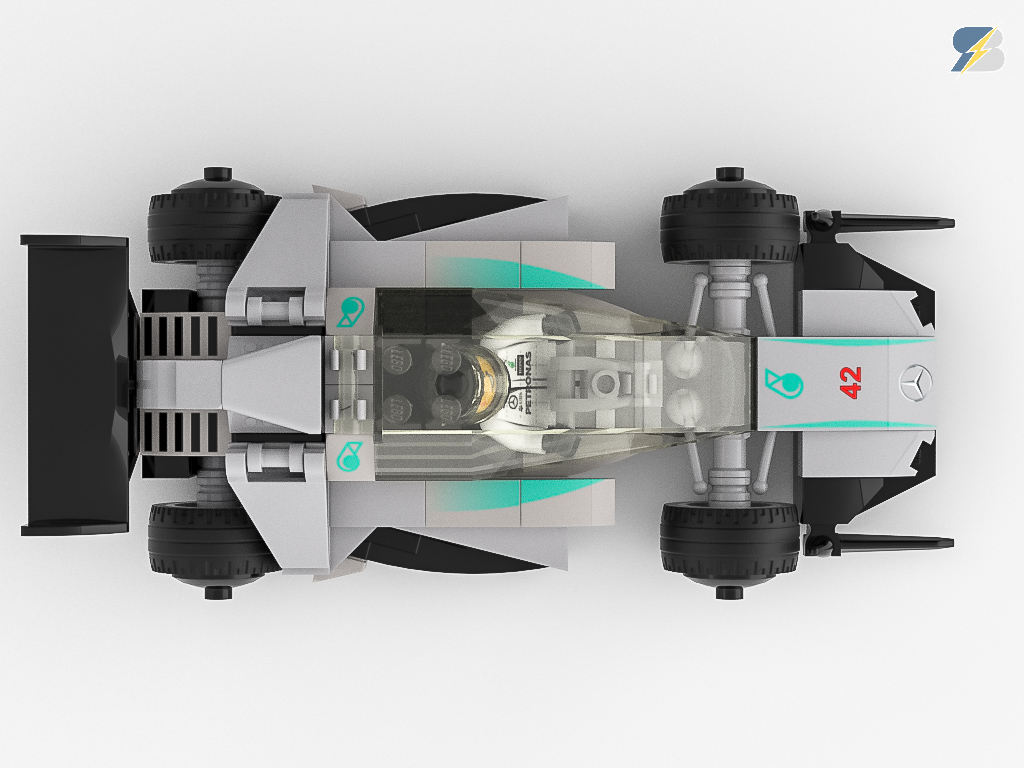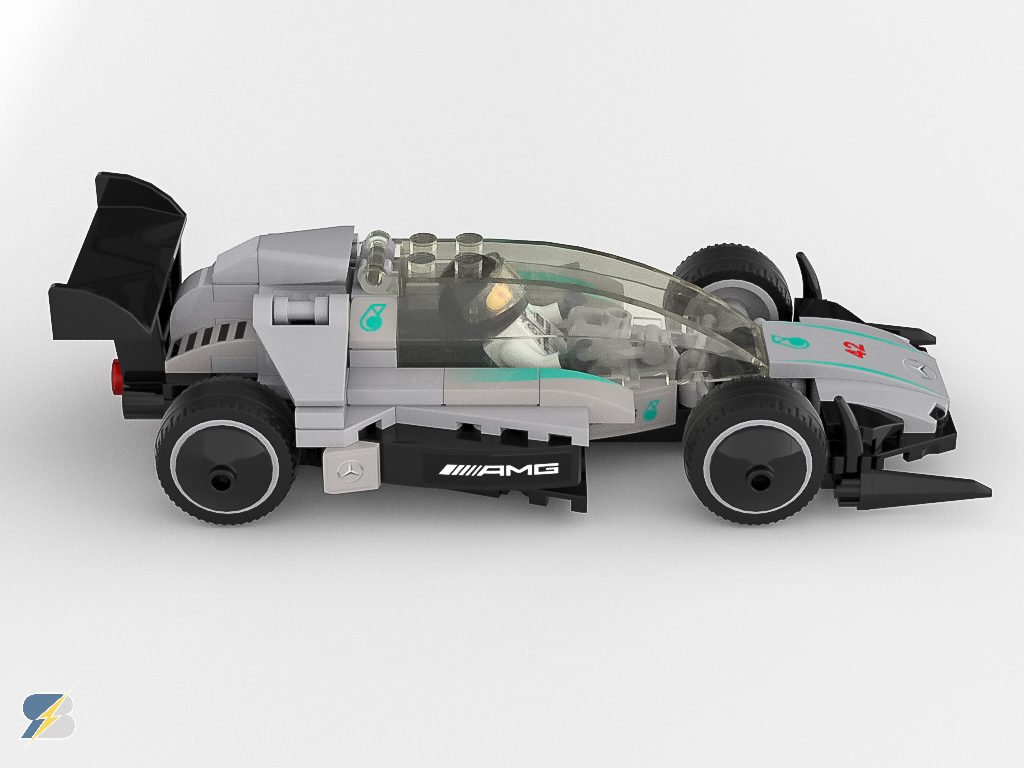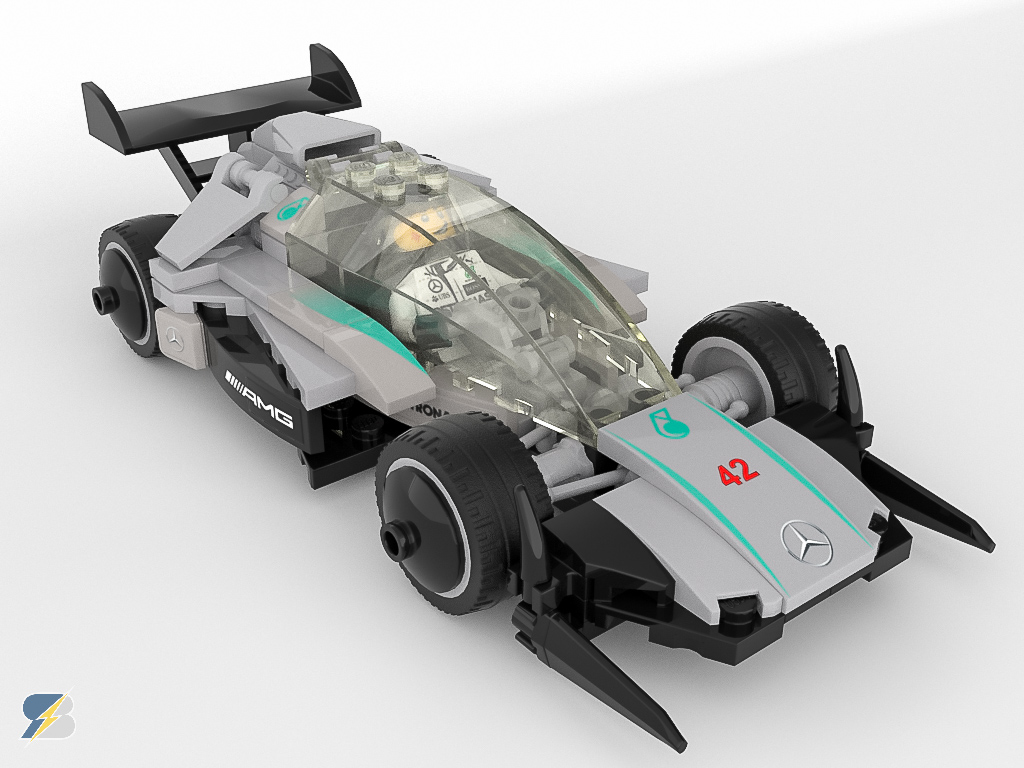
Lego has organized recently another Rebrick contest with the Mercedes AMG Petronas F1 Team – the goal was to create the F1 car of the future. I wanted to create a car that looks somehow futuristic but looks like an evolution of the current cars, and represents the color scheme and the logos of the team. As I do not have too many non-Technic bricks I decided to create a digital entry. I started to build with LDCad, that’s the application I’m more or less familiar with. I started to sketch some ideas but the summer holidays came so I forgot about it. I only realized the deadline 3-4 days before it arrived, so I had to act quickly 🙂 I finished the build in LDCad, but as it does not offer any rendering abilities I had to look quickly for a solution. The Ldraw-Povray connnection was not that easy to figure out in such a short time frame, so I had to look for something else. I considered rebuilding my car in Lego Digital Designer as there are multiple good rendering options for the official app, but unfortunately I used some pieces that are not available in LDD.
At the end I came up with the following workflow: first I recreated my car in Mecabricks which is a great online Lego 3d designer application. Luckily it was pretty easy to understand and use – this was critical due to the short time frame, I only had 2 days to find the proper application and figure out how to use it. Once the car was replicated in Mecabricks, I had the possibility to export the 3d data to Blender with the help of a great plugin which makes the process practically painless, as it transfers the materials as well. I had only 2 challenges in Mecabricks – there were 2 elements used that did not exist in the application, I imported those pieces from Ldraw with the help of another Blender plugin. The other challenge was to create and apply the custom stickers I wanted to use. I’m not sure if that’s the best way to do in Mecabricks, but I was looking for similar pieces with different stickers in the application, exported them, then created my custom stickers in CorelDraw and saved them over the exported sticker files. Once the car with the proper stickers was in Blender I only had to figure out how to set up custom lights, cameras and render my images before the deadline… If I recall correctly I had like 3 hours left before the final submission time 🙂
As usual I did not make it to the top 10 but there were many great detailed entries so it was not a big surprise 🙂 However it did not disappoint me because it was quite a nice challenge and really pushed me to the limits to come up with a decent solution in such a short time frame. You can see the rest of the images below: